NEW ROOFS | REPLACEMENT ROOFS
Roofing and Re-Roofing Solutions that you can depend on…
At EF Roofing Doncaster, we are proud to offer quality new roof installations that will stand the test of time. Our strong reputation is built on providing superior workmanship, competitive prices, and impeccable customer service.
Whether you’re building a new home, an extension, or replacing an old, worn-out roof, EF Roofing Doncaster are here to serve you. Our dedicated operatives have the knowledge and expertise to handle any type of roof construction.
Our new roof installation process is comprehensive and designed to meet our client’s exact needs. We start with a free, no-obligation roof survey, during which our experts assess the structure of your building and discuss your specific requirements. We then provide a detailed, transparent quote, ensuring you understand every element of the project, from materials and labour to time frames and costs.
One of our unique selling points is our ability to install advanced roofing systems such as dry ridge and dry verge systems. Traditionally, the ridges and verges of a roof were fixed using mortar, which can crack or crumble over time. Our dry ridge and dry verge systems offer a durable, maintenance-free alternative. They are mechanically fixed, making them more resistant to weather conditions and providing added ventilation, reducing the risk of damp and condensation in your roof space.
EF Roofing Doncaster understands that installing a new roof can be a significant investment, so we work diligently to ensure our services are cost-effective without compromising on quality. We source our materials from leading manufacturers, guaranteeing durability and long-term performance.
Why Choose EF Roofing Doncaster?
- Experience: Our operatives have decades of experience under their belts, they have honed their skills and established robust methods that ensure efficient and effective roof installation.
- Quality Workmanship: Our team is highly trained and dedicated to delivering superior workmanship on every project.
- Customer-Care: We listen to our client’s needs and tailor our services accordingly, ensuring your satisfaction from start to finish.
- Competitive Pricing: We offer fair and competitive pricing without compromising on quality or service.
- Local Experts: We know the local areas well, allowing us to source the best materials and ensure we pass on any savings we can.
- Guaranteed Satisfaction: We don’t just aim to meet your expectations; we strive to exceed them. We’re not happy until you’re completely satisfied with our work.
At EF Roofing Doncaster, we believe that a roof is more than just a structure. It’s a significant investment that deserves the best care and attention. We are committed to providing an unrivalled roofing service that ensures your roof is solid, secure, and aesthetically pleasing.
Here are just some types of new roofs which we install and a brief description of the installation process.
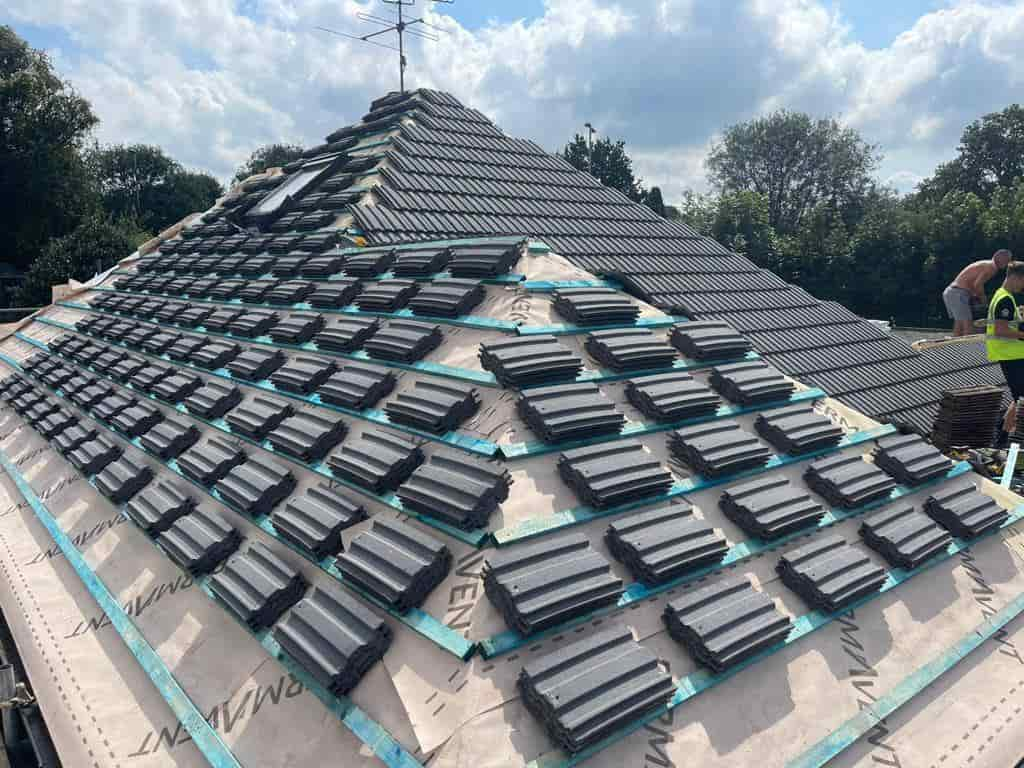

Pitched | Gable Roof
A pitched or gable roof is one of the most common types of roof in the UK. The term “pitched” refers to a roof that is sloped as opposed to flat. A “gable” refers to a specific style of pitched roof. A gable roof typically has two sloping sides that come together at a ridge, creating a shape like an inverted “V.” The ‘gable’ is the part of the wall between the edges of intersecting roof pitches, usually seen as a triangular shape beneath the roof.
Gable roofs are popular due to their simple design, ease of construction, and effectiveness at shedding water and snow. They also allow for more ventilation and provide more space for the attic or for vaulted ceilings.
The construction of a new pitched or gable roof in the UK typically involves the following steps:
- Design and Measurement: Before construction can begin, the roof must be designed and all necessary measurements taken. The design will consider the roof’s pitch, the type of materials to be used, the style of the building, and local building regulations.
- Constructing the Frame: The frame of a gable roof is typically made up of rafters that meet at the top ridge of the roof. The two main components are the ridge beam and the rafters. The rafters are cut according to the pitch and length of the roof and then fixed to the ridge beam.
- Waterproofing: Felt, or a breathable membrane is then installed on to the joists, and then battens are then installed at specific dimensions to ensure they are appropriate for the tile covering.
- Installing the Roof Covering: The choice of roof covering can vary greatly depending on the aesthetics and the climatic conditions. Materials like slate, clay tiles, and concrete tiles, are very common.
- Fitting the Fascia and Soffits: The fascia is the board that is attached to the end of the rafters, and the soffit is the board that covers the underside of the roof’s overhang. They finish the roof and provide a base for attaching gutters.
- Gutter Installation: Gutters and downpipes are then installed to direct rainwater away from the house, protecting the foundation, walls, and roof itself.
The exact process and materials can vary depending on the specific style of the gable roof, regional styles, and local building regs. Due to the complexity of the task and the importance of proper construction for the safety and longevity of the roof, it is essential to use professional roofers like EF Roofing Doncaster.

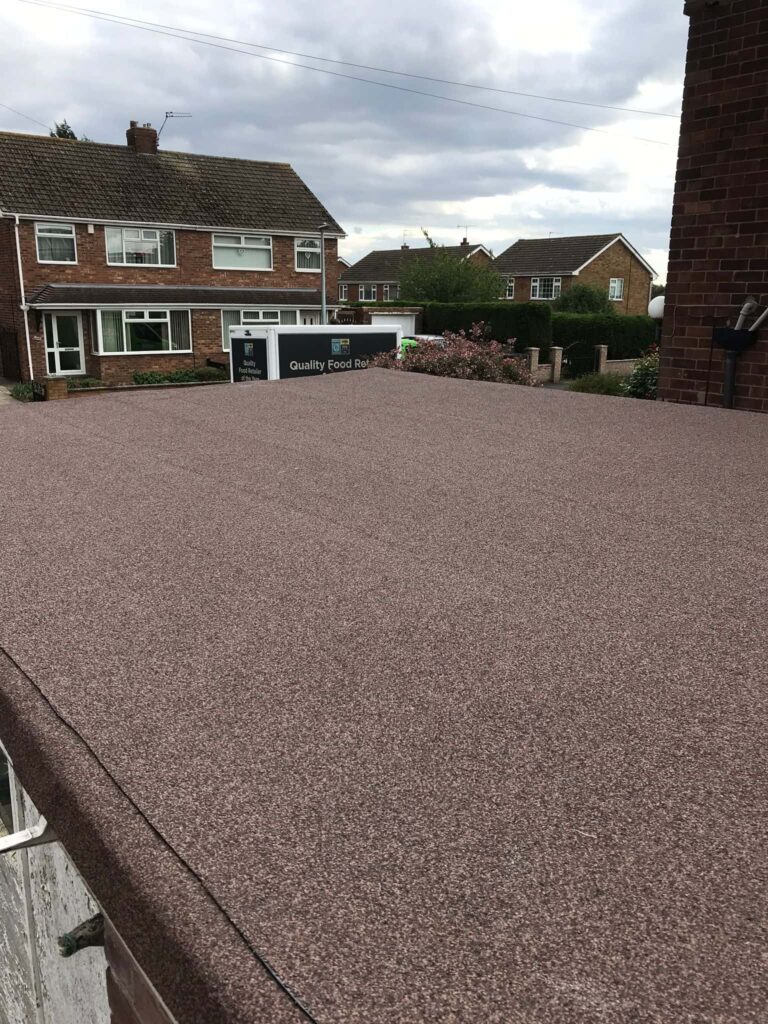
Flat Roofs
A flat roof, as its name suggests, is a roof that appears to be level or nearly level. Although it’s called a ‘flat’ roof, it must have a slight pitch or slope (usually between 1-10 degrees) to allow for water runoff, preventing water from pooling and causing damage over time. In the UK, flat roofs are often found on extensions, garages, and commercial buildings due to their cost-effectiveness and ease of construction.
Construction materials for flat roofs have evolved significantly over the years, but in the UK, the most commonly used materials include:
- Felt/Bitumen: This is the traditional and most common material used for flat roofs. It is applied in layers, usually three, and can be heated and adhered to the roof.
- EPDM (ethylene propylene diene monomer): This synthetic rubber is highly resistant to weather and commonly used in flat roofing systems. It’s often fitted in a single sheet, which helps reduce potential leak issues at seams.
- GRP (Glass Reinforced Plastic) or Fiberglass: This material is very durable and applied in a way that leaves the surface joint-free, reducing the likelihood of leaks.
- PVC (polyvinyl chloride) and TPO (thermoplastic olefin): These are single-ply roofing materials known for their durability, energy efficiency, and ease of installation.
A flat roof’s construction process typically involves the following steps:
- Preparing the Roof Deck: The existing roof surface must be stripped and prepared. This might involve removing old roof materials and ensuring the roof deck is clean and dry.
- Insulation: Insulation is often installed above the roof deck but below the weatherproofing layer. This is referred to as a ‘warm roof’ construction and is designed to reduce heat loss.
- Applying the Waterproof Membrane: The type of membrane used depends on the selected roofing system. The membrane can be torched on (felt/bitumen), adhered with a special adhesive (EPDM), or installed with mechanical fasteners and heat-welded seams (PVC/TPO).
- Installation of Flashings: Flashing is fitted around the roof’s edges and around any roof penetrations (like vents or skylights) to prevent water ingress.
- Creating Adequate Drainage: Flat roofs are typically designed with a slight fall to enable water to run off toward the drains.
It’s essential that flat roofs are installed correctly, as poor installation and lack of maintenance are leading causes of flat roof failure. Despite these challenges, flat roofs are valued for their cost-effectiveness, the potential for using the roof space (for installations such as solar panels or green roofs), and their contemporary aesthetic appeal.
Hip Roof
A hip roof, also known as a hipped roof, is a style where all sides slope downwards to the walls, usually with a gentle slope. Unlike a gable roof with a peak and two sides, a hip roof has four sides – each is a rectangle or a trapezium that slopes toward the walls. These sides meet at the top to form a ridge. This design makes hip roofs more stable than gable roofs and allows them to better withstand high winds and heavy snowfall, making them a popular choice in many parts of the UK.
The construction process of a new hip roof is more complex than a gable roof due to the different angles and cuts required. The steps generally involved in constructing a hip roof are as follows:
- Design and Measurements: As with any roof, the first step is to create a design and take all necessary measurements. This involves determining the pitch of the roof, the height, and the length of the common rafters, hip rafters, and jack rafters.
- Frame Construction: The frame of a hip roof is typically made up of a ridge board and a series of common, hip, and jack rafters. The hip rafters angle down towards the corners of the building from the ridge board, while the common rafters run perpendicular to the ridge board, and jack rafters connect the common rafters to the hip rafters. The frame will also include joists for the ceiling.
- Underlayment Installation: A water-resistant or waterproof membrane, commonly known as roofing felt or underlayment, is laid over the rafters and battens are then installed at the appropriate dimensions for the tiles to be installed on to.
- Roof Covering: Depending on the design, the outer roof covering could be slate, clay, concrete tiles, or other materials. These are typically installed from the bottom up, starting with the eaves.
- Installation of Fascia and Soffits: The fascia boards are attached to the ends of the rafters, and the soffit boards cover the underside of the roof’s overhang. These give the roof a finished appearance and also provide support for the gutter system.
- Guttering: Finally, gutters and downpipes are installed to effectively channel water away from the roof and building, protecting the structure from water damage.
The exact construction process can vary depending on the design of the roof, the building it’s being installed on, and certain building regulations. As always, constructing a roof is a complex task but we’ll ensure your new roof is safe, durable and will last for years to come.

Mansard Roof
A mansard roof, also known as a French roof, is a type of roof characterised by two slopes on each of its four sides. The lower slope is steeper, almost vertical, while the upper slope, which may not be visible from ground level, is much more gentle. This design maximises the amount of usable space within the roof, creating an additional full storey under the roof, often referred to as a garret.
Mansard roofs became popular in France during the 17th century and are often associated with French Renaissance architecture. Still, they can also be found in the UK, particularly on period properties or French architectural influences.
Constructing a mansard roof involves the following steps:
- Design and Measurements: Designing a mansard roof is more complex than other roof types due to the dual slopes on each side. Accurate measurements are essential to ensure the correct pitch of both the steeper lower slope and the gentler upper slope.
- Constructing the Frame: The mansard roof construction begins with a standard roof frame, which will support the upper slope. This is typically a simple pitched or hipped roof structure with a ridge beam and rafters.
- Adding the Mansard Frame: Once the upper roof frame is in place, the lower, steeper section of the roof is built. This is done by attaching short, vertical timbers (known as studding) to the outside edges of the upper roof structure and then connecting these to the walls of the building. The steeper, the lower slope, the more this will resemble a vertical wall.
- Decking Installation: The decking, typically plywood or OSB (Oriented Strand Board), is then applied over this frame.
- Underlayment Installation: A layer of waterproof or water-resistant underlayment, typically roofing felt, is then applied over the decking.
- Installing the Roof Covering: The outer roof covering, often slate or tile, is then applied. Due to the almost vertical pitch of the lower slope, care must be taken to ensure these are adequately secured to prevent them from slipping.
- Installation of Dormer Windows: One of the advantages of a mansard roof is the ability to include dormer windows in the lower slope, providing natural light to the rooms in the roof. These need to be carefully installed and sealed to prevent leaks.
- Gutter Installation: Finally, gutters are installed to channel water away from the roof and the building.
As with any roofing project, building a mansard roof should be done by professionals or under professional guidance due to the complexity of the task and the importance of ensuring the roof is structurally sound and waterproof. EF Roofing Doncaster have dealt with many mansard roof construction projects over the years. Contact us to discuss your needs,
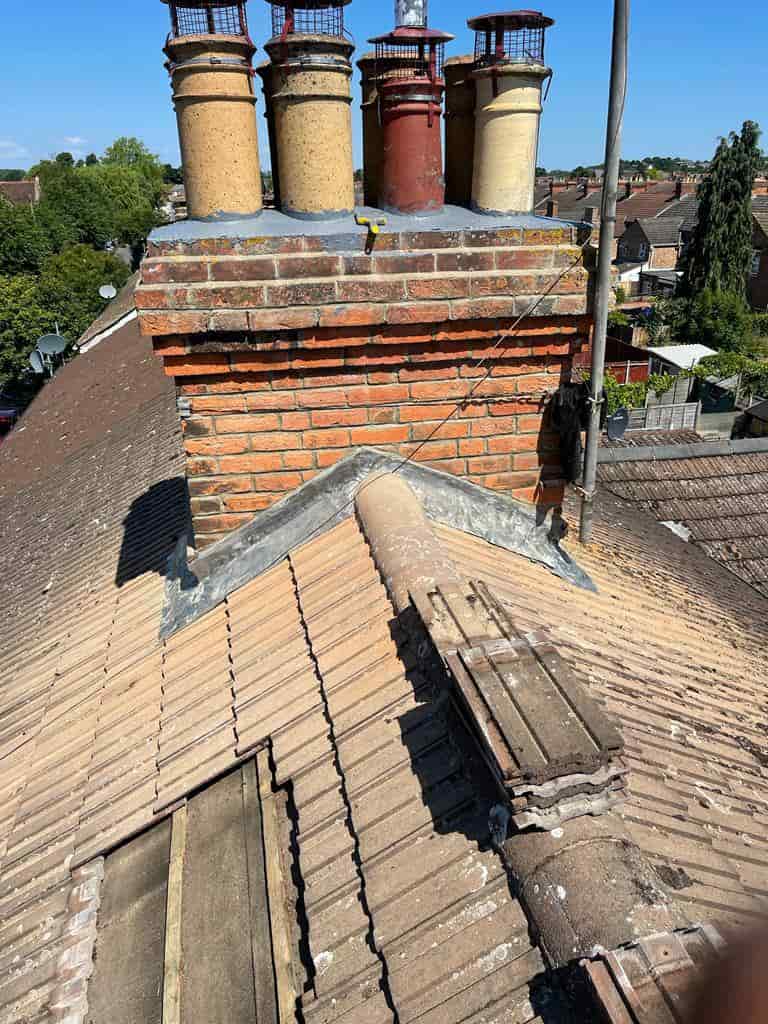
If you are looking for roofing repairs in Doncaster instead then we can also help.
Please don’t hesitate to Contact Us anytime. We will be happy to assist you.
Need roofing in other areas? Check out Roofing Northampton for a professional service.